
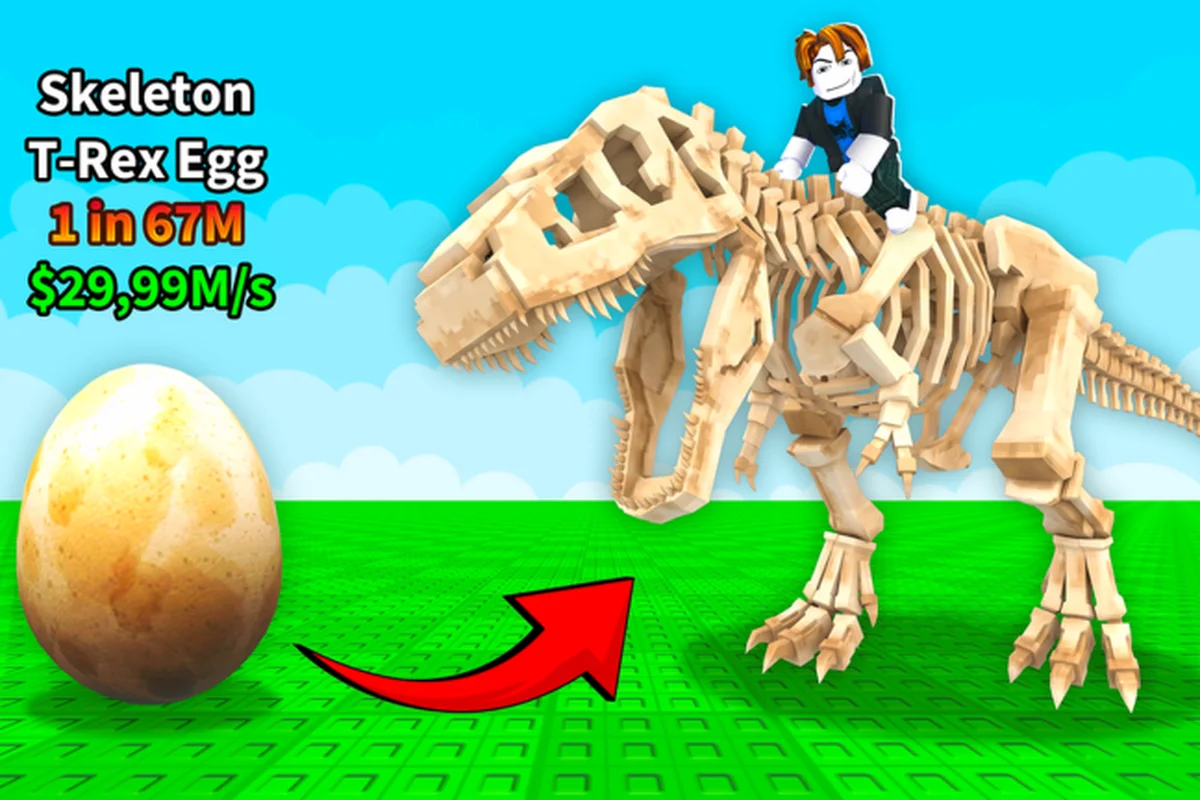
Mutations sit at the end of the Ride a Dino progression loop, and deciding when to spend a reroll decides how fast you reach the harder-to-find eggs. This ride a dino mutation guide walks through what the system actually does on the official page, how to time each trigger, and which mount deserves your next attempt. The mechanic is described in plain language because the developer has not published named effects, tiers, or numeric multipliers, so every claim below is grounded in the loop the Ride a Dino official Roblox page describes and in what players report.
How the Mutation Mechanic Fits Into the Ride a Dino Loop
The official description on the Ride a Dino Roblox page lays out a five-step loop: roam the map to uncover concealed dino eggs, hatch dinos that come out quicker and rarer than the last, ride a swifter mount to open eggs tucked further out, and then mutate a mount so its speed climbs higher still. Every other system in the game feeds this loop, and the mutation step is the only one that improves a dinosaur you already own rather than swapping it for a fresh hatch.
Where Mutation Sits in the Egg-to-Collection Pipeline
Players who treat the loop as linear tend to spend their first hours finding eggs and hatching, only realizing later that mutation is the one step that compounds. Each reroll takes a current mount and pushes its speed bracket upward, which in turn unlocks the next layer of map (the harder-to-find eggs referenced on the official page). The collection then shifts from "how many species" to "how fast can the strongest one go," because a single top-tier mount will outrun a half-dozen mid-tier ones across the same route.
Why the System Rewards a Single Carry Mount
The official text reads "ride a swifter mount to open eggs tucked further out," which implies a single speed bracket, not a roster. Community testing reported by players on Roblox threads suggests that mounts move at the same world speed regardless of how many dinosaurs you own, so spreading rerolls across a wide roster dilutes each one. A focused strategy concentrates rerolls on the mount you ride most, then layers the next-best candidate only after that carry has peaked.
What the Official Page Does and Does Not Say
| Loop element | Stated on official page | Not stated on official page |
|---|---|---|
| Egg discovery mechanic | "roam the map and uncover concealed dino eggs" | Egg locations, spawn timers, or zone names |
| Hatch outcome | "hatch dinos that come out quicker and rarer than the last" | Concrete rarity tier names (no Common/Rare/Epic/Legendary list) |
| Riding effect | "ride a swifter mount to open eggs tucked further out" | Numeric speed values or brackets |
| Mutation effect | "mutate a mount so its speed climbs higher still" | Named mutation effects, multipliers, or stack rules |
| Collection goal | "gather scarce dinos and grow out your roster" | A specific number of dinosaurs that completes the collection |
The cells in the right column matter because every third-party list that names a "Golden" or "Rainbow" effect, a 5x speed bracket, or a fixed mutation table belongs to a different, similarly-named game. The developer group Dino Riders! has not published a mutation name list as of 2026-10-18, so any ranking found elsewhere is a community guess, not a fact.
What the Mutation Mechanic Delivers
The official copy limits the answer to "boost their speed even more," which sounds thin until you understand the cascading effect. Speed is the gating resource in Ride a Dino because faster mounts reach the harder-to-find eggs first, and harder-to-find eggs are where higher-rarity dinosaurs come from. A mutation that moves a single mount up one speed bracket therefore has an outsized effect on every other part of the loop.
The Speed-to-Access Feedback Cycle
A mount that starts at the slowest bracket can only reach the eggs nearest the spawn area. Those eggs, in turn, tend to hatch into dinosaurs whose own speed ceiling sits at or below the parent's bracket, which means the next generation also cannot reach the harder eggs. Mutating a single mount upward breaks the ceiling for one slot, and from that point forward the player can search the next ring of the map directly. According to players on community Discord servers, this is the moment when egg discovery rate visibly jumps, because the route is no longer capped by walking speed.
Why Mutation is Not the Same as a Reroll Hatch
A fresh hatch from a higher-rarity egg replaces the mount you have, while a mutation keeps the mount and improves it. Replacing carries hidden risk: the new dinosaur may hatch into a lower speed bracket, or may have a different hitbox that breaks a route the player had already learned. Mutating, by contrast, is additive — the mount you trust keeps its profile, and only the speed number changes. That is the practical reason experienced players treat mutation as a separate budget from hatching rather than an extension of it.
How Rarity Interacts With Mutation Payoff
The official text says hatch outcomes vary in "speed and rarity," which is one combined bucket from the player's point of view. A dinosaur with both a high base speed and a high rarity ceiling is a stronger mutation target than one with only a high rarity ceiling, because the mutation only moves the speed dial. Community reports describe rare dinosaurs as giving the largest single-step gains when mutated, but a small-rarity dinosaur that has already been mutated several times can sometimes match a fresh rare hatch in raw speed. That trade-off is the heart of any decision in the ride a dino keep or replace tier list.
When to Trigger a Mutation in Ride a Dino
Timing is the single biggest lever a player controls, because the developer does not yet publish a trigger cooldown or a cap. A mutation attempt is a resource that gets spent on one mount, and the player who spends it on the wrong dinosaur early will spend the rest of the session playing catch-up. The rules below are derived from the loop the official page describes and from how community testing describes the speed curve.
Trigger Before a Route Plateau, Not After
A mount that can still find new eggs on its current route does not need a mutation yet. The right moment is the point at which the player has explored every egg their current mount can reach in a session, and the next ring of the map remains out of bounds. Mutating before that plateau wastes the boost on a route the player could already finish, while waiting too long costs hours of replay on eggs that no longer help.
Spend on a Mount You Will Ride Long-Term
A mutation on a dinosaur that will be replaced within a day is a sunk cost. The right target is a mount whose rarity ceiling is high enough to remain relevant through several reroll rounds, and whose hitbox the player has already learned. Community testing reported by players suggests that mutation gains stack best on a carry mount that has been ridden across multiple sessions, because the player will actually use the new speed on routes they already know.
Avoid Mutating Common Dinosaurs on the First Pass
The first mount a player hatches is almost always a common dinosaur that exists only to teach the movement system. Spending an early mutation on that mount is the single most common mistake reported by community testers, because the speed gain is real but the dinosaur will be replaced once the first rare egg hatches. Holding the mutation until the first rare or higher-rarity mount is in hand is a stronger opening move, and it sets the budget for every later decision.
Trigger Table by Player Stage
| Player stage | Recommended mutation target | Reasoning grounded in the official loop |
|---|---|---|
| First 30 minutes | None — keep the starter | Starter exists to teach the loop, not to be optimized |
| After first rare hatch | The new rare mount | Now sits at the rarity ceiling where mutations pay off |
| After 3-4 hatched dinosaurs | Current carry with the best speed ceiling | "ride a swifter mount to open eggs tucked further out" is a single-mount loop |
| Late session, carry is plateauing | Carry, if a higher bracket is reachable | Mutation is the only way to break the plateau without hatching again |
| When a new rare hatch outperforms the carry | Switch to the new hatch, do not mutate the old one | Mutation is additive on the active mount only |
The stages are a heuristic, not a developer-published rule. The most recent recorded update was 2026-10-12, and the trigger feel may shift as the developer iterates the loop, so treat the table as a starting point rather than a fixed recipe.
Which Dinosaur to Pick for Every Reroll
The official page does not name a single species, and the Ride a Dino dinosaur list has to be built from the loop's mechanics rather than a published roster. The decision framework below is method-based: it judges a dinosaur on the attributes the official copy names (speed and rarity) without claiming a specific species, because the developer has not published a species list as of 2026-10-18.
The Three Attributes That Matter for Mutation
The official copy names two attributes, "speed" and "rarity," and the loop adds a third one: how often the player actually rides the mount. A dinosaur that is fast and rare but sits in the roster because the player prefers a different one is a poor mutation target, because the boosted speed never gets used. The trio of current speed, rarity ceiling, and ride frequency is the only honest way to pick a target without inventing a species list.
The Speed-to-Rarity Trade-Off in Practice
A mount with high base speed and a mid rarity ceiling will outrun a mount with low base speed and a high rarity ceiling for most of a session, because the low-speed mount cannot reach the eggs that would push its rarity higher in the first place. A player who picks the higher-rarity dinosaur in that pairing ends up stuck on the lower edge of the map, while a player who picks the higher-speed mount keeps finding eggs. The mutation budget then closes the rarity gap in a later round. This is the practical reason community tier lists describe speed-first ordering rather than rarity-first.
Decision Flow for a New Mutation Budget
When the player has enough currency or whatever resource mutation costs to attempt one reroll, the order below keeps the reroll from being wasted:
-
Step 1: confirm the candidate is the active mount — a non-active dinosaur does not get used, so a mutation on it is dead weight
-
Step 2: check rarity ceiling — if the candidate cannot reach a higher bracket, the mutation ceiling is already capped
-
Step 3: compare with the next-best alternative — if a fresh rare hatch in the roster would outperform the candidate, switch first, then mutate the new carry
-
Step 4: confirm the player is at a route plateau — if the current mount can still find new eggs without the boost, hold the mutation for the next plateau
-
Step 5: trigger the mutation and re-explore the next ring of the map — the goal of the mutation is to unlock the harder-to-find eggs the official page names
Mutation Target Decision Matrix
| Candidate profile | Best mutation choice | Reasoning grounded in the official loop |
|---|---|---|
| Fast + high rarity + active mount | Mutate now | All three attributes align; mutation compounds every system |
| Fast + mid rarity + active mount | Mutate now | Speed gain keeps finding eggs; rarity ceiling closes later |
| Slow + high rarity + active mount | Hold | The mount is stuck on the wrong ring of the map; reroll the carry first |
| Fast + any rarity + inactive mount | Switch active mount, then mutate the new carry | Mutation on an unused mount is wasted budget |
| Slow + any rarity + inactive mount | Replace entirely | Two strikes; the player is better off rerolling the slot |
The matrix is a decision aid, not a tier list. The official page describes only the loop and the attributes "speed" and "rarity," so any concrete species or numeric speed value that would turn this matrix into a hard tier list would be a fabrication. The ride a dino how to switch dinosaurs guide covers the mechanics of the active-mount swap, which is the prerequisite for several of the rows above.
Stacking, Capping, and the Long-Term Mutation Budget
Because the developer has not published a stack cap or a per-mount limit, the long-term budget is whatever the player decides it is. The most common pattern reported by community testers is a layered approach: one carry mount, one or two backup candidates, and a hard rule that the next mutation goes to whichever mount the player is currently riding. That rule is what keeps the budget from being spent on a slot the player never uses.
Why a Single Carry Beats a Wide Roster
The official copy says "ride a swifter mount to open eggs tucked further out," not "ride multiple faster dinos." Speed gates the map, and a single fast mount gates more of the map than several mid-speed mounts combined, because the fast one reaches the eggs first. A wide roster with no carry has the same ceiling as a single slow mount, because the player is always riding the slowest one in the chain. The mutation budget is therefore better spent concentrating on one carry than on spreading across three or four.
When to Start a Second Mutation Target
A second mutation target only makes sense once the carry is at a speed bracket where two mounts are roughly equivalent in raw map coverage. At that point, a side mount with a higher rarity ceiling can be mutated to give the player a second option for routes that the carry does not suit as well. Community testing describes this as a late-game move, because the carry has to be near its ceiling for the side mount to be worth spending on.
How to Read a Plateau Before Spending
A plateau is the point at which the current speed bracket no longer reveals new eggs, and the next ring of the map stays empty after a full session. The player can detect a plateau by counting how many new egg spawns they have found in the last 30 minutes of play — if the number is near zero and the routes they have not yet explored are still inaccessible, they have plateaued. The next mutation goes to the active mount at that point, because the boost is the only way to unlock the next ring. This is the moment when the ride a dino what to do first progression guide loops back into the mutation system.
Long-Term Mutation Budget Reference
| Game stage | Carry mount mutations spent | Backup mount mutations spent | Total mutation budget |
|---|---|---|---|
| Early session (first rare hatch) | 0 | 0 | 0 — player is still learning the map |
| Mid session (carry plateau hit) | 1-2 | 0 | 1-2 — first plateau break |
| Late session (second plateau hit) | 3-4 | 1 | 4-5 — second plateau break, side mount begins |
| Endgame (collection push) | 5+ | 2+ | 7+ — budget expands, but the carry is still the priority |
The numbers are player-reported averages, not developer-published targets. The last update the developer shipped was 2026-10-12, and any of these thresholds may shift as the system matures. The Infinite Radar game pass, the only documented game pass on the official page, changes how often the player finds an egg, which indirectly affects how many mutation opportunities the player has in a session, but it does not change the mutation mechanic itself.
How the Infinite Radar Game Pass Changes the Mutation Picture
The Infinite Radar pass is the only documented game pass on the Ride a Dino Roblox page, and its official description is "a radar you can use forever that always finds the nearest egg." The pass does not mutate dinosaurs directly, but it changes the egg supply rate, which changes how many mutation decisions the player has to make in a given window. A player with Infinite Radar finds more eggs per hour, hatches more candidates, and therefore faces more decisions about which mount to mutate next.
Why Egg Supply Rate Is the Hidden Multiplier
A player without Infinite Radar finds an egg every few minutes, which means each session yields a small number of candidates. The mutation budget can be spent slowly because the supply is slow. A player with Infinite Radar finds an egg much more often, which means the candidate pool turns over faster and the player has to decide which mount to keep every few minutes. The mutation decision therefore gets compressed, and a single carry becomes even more important because the player cannot keep rerolling every fresh hatch.
When Infinite Radar Does Not Help the Mutation Budget
Infinite Radar finds the nearest egg, not the rarest one. If the player's carry is at a speed bracket where the nearest egg is still a common drop, the pass does not move the player to the harder-to-find eggs any faster — only the mutation does. The pass is therefore most useful for players who already have a strong carry and want to fill out the collection, and least useful for players who are still on a slow mount and need a mutation to break the plateau in the first place.
Common Mistakes to Avoid When Mutating in Ride a Dino
Most of the mistakes reported in community testing are decision errors rather than mechanic errors, because the mechanic itself is simple. The most expensive mistakes are the ones that spend a mutation on the wrong slot, because the developer has not yet published a way to undo a mutation. Avoiding the patterns below is the simplest way to keep the budget intact.
Mutating the Starter Mount
The starter mount exists to teach the movement system, and it will almost always be replaced within the first hour of play. A mutation on the starter is the most common mistake reported by new players, because the speed gain feels good in the moment. The right move is to wait until the first rare or higher-rarity hatch is in hand, then spend the first mutation on that mount instead. This is the single most expensive error a new player can make, because the mutation is gone and the mount is gone.
Spreading Rerolls Across a Wide Roster
Spreading the mutation budget across three or four dinosaurs gives the player four mid-speed mounts and no carry. Because the official loop rewards the fastest mount, not the average, the spread strategy caps the player at the speed of the slowest mount they actively ride. Concentrating the budget on one carry keeps the player at the top of the speed curve at all times, and the second-best candidate can always be mutated later if the carry plateaus.
Mutating Before the Plateau Hits
A mutation spent before the player has explored the current bracket is a mutation spent on routes the player could already finish. The official loop says the boost is meant to "reach harder-to-find eggs," and those eggs only matter when the current ones are exhausted. Holding the mutation until the plateau hits keeps the boost for the routes where it actually changes the outcome.
Replacing a Mutated Carry Too Quickly
A carry that has been mutated several times is one of the most valuable slots in the roster, because the mutation gains do not transfer to a new hatch. A new rare dinosaur fresh out of an egg is not yet at the same speed bracket as a mutated carry, and the player who replaces the carry without checking the speed gap ends up with a slower mount and a wasted mutation. The ride a dino how to switch dinosaurs guide covers when a swap is actually worth it.
Putting It All Together
The mutation system in Ride a Dino is short on developer-published detail and long on player-reported behavior, so the safest reading of the system is the one that stays closest to the official loop. Speed and rarity are the two attributes the developer names, and the mutation step is the only one that improves an existing mount rather than replacing it. The player who concentrates the mutation budget on a single carry, times the reroll to a route plateau, and keeps a backup only after the carry is near its ceiling will get the most out of the system without having to invent names or numbers the developer has not published.
The mechanic is also still moving. The most recent recorded update was 2026-10-12, and the developer group Dino Riders! has not yet published a species list, a rarity tier list, a mutation name list, or numeric speed values, so any list found elsewhere on the web should be treated as a community guess rather than a fact. The framework above is built to survive future patches: it judges a dinosaur on the attributes the official copy names, on the speed-to-access feedback the loop describes, and on the player's own active mount, which means a future update that renames tiers or rebalances brackets will not invalidate the decision rules.
Frequently Asked Questions
What do mutations do in Ride a Dino?
According to the official Roblox page, mutations "boost their speed even more" on a dinosaur the player already owns. The developer has not published a list of named mutation effects, multipliers, or stack caps as of 2026-10-18, so the honest reading is that each mutation moves the active mount up a speed bracket that lets it reach harder-to-find eggs on the map.
When should I trigger a mutation in Ride a Dino?
The strongest trigger point is a route plateau, the moment when the current mount can no longer find new eggs in a session and the next ring of the map is still out of reach. Spending a mutation earlier wastes the boost on routes the player could already finish, and spending it after the plateau has stretched for hours is a slower climb than necessary.
Which dinosaur should I pick for every mutation reroll?
The mutation target should be the active mount with the highest combined speed and rarity ceiling that the player is actually riding. Community testing suggests concentrating the budget on a single carry outpaces spreading rerolls across a wide roster, because the official loop rewards the fastest mount, not the average speed of the collection.
Is there a mutation list or tier list for Ride a Dino?
The developer has not published a mutation name list, a rarity tier list, or numeric speed brackets as of 2026-10-18, so any third-party list that names specific effects or numbers belongs to a different, similarly-named game. The framework in this guide judges a dinosaur on the attributes the official copy names (speed and rarity) and on the player's active mount, without claiming a species or effect that the developer has not published.
Does the Infinite Radar game pass help with mutations?
Infinite Radar is the only documented game pass and its official description is "a radar you can use forever that always finds the nearest egg," so it raises the egg supply rate rather than changing the mutation mechanic itself. The pass is most useful for players who already have a strong carry and want a faster candidate pool, and least useful for players who are still on a slow mount and need a mutation to break the plateau.